User Guide
User Guide
User Guide


User Guide
User Guide
User Guide
|
Before you can place a cell, you must activate it for the desired method of placement:
For general Placement with the Place Active Cell tool or the Place Active Cell Matrix tool in the Cells tool box. This cell is called the Active Cell.
 |
 |
As a line Terminator with the Place Active Line Terminator tool in the Cells tool box. This cell is called the Active Line Terminator.
 |
As a Point cell, for placement with the tools in the Points tool box. This cell is called the Active Point Cell.
 |
For Patterning with the Pattern Area tool in the Patterns tool box. This cell is called the Active Pattern Cell.
 |
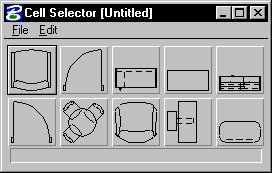 |
 | You can customize the Cell Selector dialog box for other uses. |
If Use Shared Cells is on in the Cell Library dialog box, cells are placed as shared cells.
The first time you place a cell with Use Shared Cells on, the shared cell definition (elements comprising the cell) is stored in the DGN file in much the same way as it is stored in the cell library. To place subsequent instances of the shared cell, the cell library does not need to be attached. In other words, a shared cell can have many instances in a DGN but only one definition. When a shared cell instance is replaced using the Replace Cells tool, all instances of the cell are replaced!
For an unshared cell, on the other hand, the library definition is stored in the DGN file each time the cell is placed. Using shared cells can therefore be a way to reduce DGN file size. The reduction is greatest in files with cells that have a large number of component elements and/or instances.
| It is not necessary to know where the shared cell definition is in the DGN file; identifying any instance of the shared cell identifies the actual definition. |
The use of shared cells is recommended for these reasons:
Shared cells are faster to place and manipulate than unshared cells. The first time a cell is placed in the DGN file, the cell library in which it is stored must be attached. If the cell is placed as a shared cell, it is not necessary to have the cell library attached to place additional instances of that cell.
All instances of a shared cell in the DGN file are replaced when any instance of that shared cell is replaced.
Shared cells can be associated with points on other elements, if Association Lock (Settings > Locks > Association) is on. For example, if a shared door cell is placed in a wall and associated with that wall, the door will automatically move if the wall is moved.
Shared cells usually reduce DGN file size, thereby improving performance.
The Relative tool setting for the Place Active Cell tool and Select and Place Cell tool controls the level(s) on which a graphic cell is placed.
If Relative is off, a graphic cell is placed on the same level(s) as it was created (absolute placement).
If Relative is on, a graphic cell is placed on a level or levels relative to the Active Level. For example, consider a graphic cell that was created with elements on levels 5, 7, and 8. If Relative is on and the Active Level is 1, the cell is placed on levels 1, 3, and 4. If the Active Level is 45, the cell is placed on levels 45, 47, and 48.
| For information about what it means for a cell to be a “graphic cell,” see Cell types. |
When you create a cell's geometry, you typically place elements on the level where you want those elements to ultimately appear when the cell is placed in a design. Using an alternate approach, you can create parts of a cell's geometry on the Default level. To enable element placement on the Default level, set the active level to Default in the Attributes tool box, and set Symbology to ByLevel in the Level Manager dialog box.
If you place a cell containing elements that were placed with those settings in effect, those elements take on the attributes of the active level. All other elements in the cell are placed on their defined levels and take on those levels' respective attributes. This technique applies only to graphic cells, not point cells.
For example, suppose you created a cell with a line element on the Default level with By Level attributes assigned and an arc element on level Lvlnam1 with By Level attributes assigned. When you place the cell on level Lvlnam3:
The line element is placed on the Lvlnam3 and takes on the By Level attributes of Lvlnam3.
The arc element is placed on Lvlnam1 and takes on that level's By Level attributes.